git
Table of contents
Intro
Git is one of the most important tools you will learn, other than knowing
:wq(thank me later).
Git is a version control system, similar to labeling your essay drafts “essay”, “essay_draft2”, “essay_feedback”, “essay_final”, “ESSAY_FINAL_FINAL.” It is imperative to know Git, and know it well. Situations like being stuck in Baskin’s E2 building during a horrible winter storm when the power, internet, and cell service go down in the middle of working on a CSE13S assignment is when you want to know Git (true story).
I have used Git to back up and submit my school work, work on open-source projects, and collaborate with others seamlessly. You must learn the basics of Git.
Further resources
- Official
gitdocumentation - Git Immersion, a very helpful tutorial
- Git glossary by Atlassian (BitBucket)
Prereqs
Ensure git is installed:
$ sudo apt-get install git
If you are having issues with installing, consult the troubleshooting page.
TL;DR
For most of your assignments and projects that you do individually, all you have to remember is:
git add <file1> <file2> …
git commit -m "committing!"
git push [origin main]
Add, commit, push. Add, commit, push.
Previewing Commands, the “origin main” (Note: the default branch may be also be called master) does not have to be specified if you’re working with one remote and one branch (more about these terms later), but it’s the safest way to know exactly where you are pushing, and I recommend those two arguments each time to prevent errors.
Terms
Repository
A repository (colloquially “repo”) is the crux of your project, containing files, commit history, and other key components of Git. A repository is easily identifiable by folders that contain a hidden .git folder. Do not manually mess with anything inside .git unless you know what you’re doing!
Commit
A commit is a snapshot of your repo at a point in time, think of saving state in a game or this very doc you are reading with its own history. Developers often commit after they implement a new feature or make substantial progress. Commits allow you to recover or revert to earlier versions of your work. Please commit often, especially when you have made a breakthrough on something you were stuck with.
My CSE13S repo had 138 commits, sometimes 3 within an hour!
In their most simplest form, git commits are in a linear chronological order. If you commit changes to fileA at timeA, then fileB at timeB, and then finally fileC at timeC, does the commit at timeA contain information about the latest version of fileC? No!
Since timeA < timeC, fileC either does not exist within the context of timeA, or timeA contains an older version of the file. timeC will have all of the information of timeA, plus any updates.

Hash
Every commit has a 40-character commit hash associated with it. These are unique identifiers for every commit ever made
A running joke in CS: if you can cheat a git hash, you’ll get your whole degree right then.
The short form of a hash is usually the first 8 characters, but you will most likely be expected to turn in the entire hash. This can be obtained on the GitLab site, or by copying from git log (see Commands)
 | GitLab’s interface in the “Commits” tab of the repo.83f4cb40 is the short-hand, the full commit hash is copied into my clipboard when I click the clipboard icon. |
Referring to the diagram in Commit, you will choose which point in history your repo will be graded on. In most cases, this will be your most recent commit (see the sidebar of a GitLab repo -> Code -> Commits), but in case it isn’t, you have the ability to choose by submitting the hash of any commit.
Remote
GitHub? GitLab? Bitbucket? These are common repository hosting sites, powered by the Git version control system. The online location of your repository is called the remote, as it is separate from your local repository.
Remotes are often named, such as “origin”, “remote.” The main remote for a repo (where you obtained its URL) is usually named origin automatically.
The only part where you need an internet connection is to push onto the remote repository. That is, your local repository is local to your device and does not leave anywhere until you explicitly push it to a remote (which is not required by Git in any form!). Even if you are disconnected, Git allows you to continue working and committing, and push onto remote when you are able to.
The following diagram shows the relationship between the working directory (where you are currently coding in), the staging area (the preparation for a commit), the local repository (where your commits are), and the remote repository (the online location).

Branch
While most of your school life will be working by yourself, on a single branch (usually called “main” or “master”), branches are a crucial part of collaboration. A branch can be thought of as a different parallel version of the repo.
The main branch is often reserved for deployed, known-to-be functional code for customers/users, while the other branches are features in development that have yet to be pushed into production.
It would be good practice to complete assignments on separate branches, then have a final “submission” by merging your branch into the main, but this is not required by any means. You are allowed to solely work on the main branch of your repo, and I recommend doing so if you are not familiar with git merging.
Say you are an employee tasked to work on a feature A. Instead of wrecking havoc during your dev process, you branch out from the current main branch, and work on your feature, until it is merged back onto main and users can now use A.
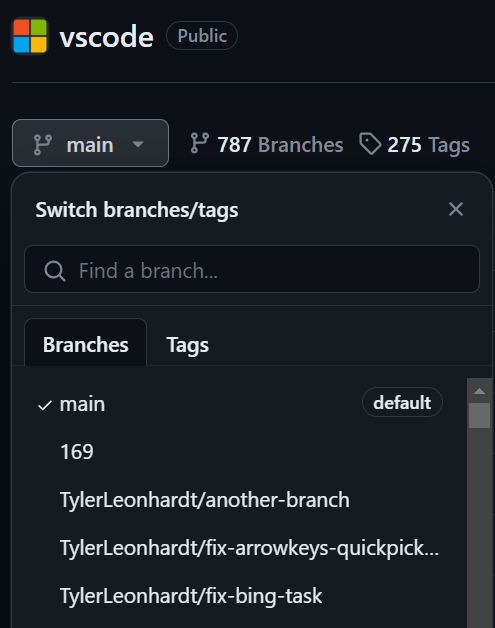 | A peek into the branches of Microsoft’s (open-source!) VSCode repository. Why do you think having separate branches for bug fixes, new features, etc. is crucial to separate away from production code that countless users are using at this moment? |
And there’s more.
A great dev would know the basics of merging, forks, pull requests, rebasing (shudders), and more. Do not stress, these are learned with time and patience, and are not required for the simple task of coding and submitting assignments. As with any tool however, I implore you to learn more about Git, as it separates a good dev from a great dev. And your friends will appreciate you fixing their daunting Git errors (many more true stories).
Commands
Here are some commands and some of the most common options for them.
Nearly all of these commands (except for git clone and global git config calls) requires you to currently be in a directory containing a repository.
Need a refresher on how to navigate the command line? Visit the page on
bash.
<> indicates a mandtory argument, while [] indicates an optional argument.
| Command | Explanation |
|---|---|
git clone <url> [name for the resulting directory] | Clone a remote repository into a local directory. |
git add <file1> [file2] … [file_n]git add -f .dotfilename | Stage a file’s changes into the staging area to be committed in the future. This doesn’t mean “add” in the sense that there is also a “git delete”. This means to “stage the latest changes, including deletion, of a file.” If you need to delete a file from your repo, you should delete it locally, add that change, and push again. Dot files (such as .gitignore) tend to get ignored by git, force adding it by using the -f flag.NOTE: git add . stages any file in the current directory and git add -A stages ALL changes in the repository.1 I highly recommend never doing these actions, else risk committing something you didn’t want to. Use TAB to autocomplete file names on the command line. |
git restoregit restore --staged <file> | Restores a file to the most up-to-date history for it in the commits. Also used to remove files that were accidentally staged (WITHOUT reverting, just un-staging). |
git commitgit commit -m “string msg” | Commit files that are in the staging area with a message. You almost always have to specify the -m and commit message. A commit goes into your local repository, it is not yet to the remote. |
git push [remote] [branch] | Push commits that are on your local repository onto the online repository. Local -> Remote. As mentioned earlier, I recommend always specifying the remote and branch names, such as “ git push origin main”, to indicate I am pushing onto the branch called main of the remote called origin. |
git pull [remote] [branch] | Pull the remote repository onto your local repository. Remote -> Local. It is good practice to do this before starting any work session, especially if you work across different devices. Many, many horrendous errors can occur if your local and remote repos do not agree on the correct history. |
git log | Shows the history of previous commits, their full hash codes, and other information. Similar to Vim, press q to escape the view, and use the arrow keys to go up and down. Note: if you are unable to push (maybe the GitLab server is not working) your final commit for an assignment, use this to get the hash and submit to Canvas anyway, then push ASAP when it is possible! |
git remotegit remote -v | Get information about the remotes associated with the repo. Use the option -v to get verbose information about the URLs associated with the remotes. You will usually see a (fetch) and/or (push) to indicate what the remote supports. |
git statusgit status -uno | Get the current status of the repo, including what is currently in the staging area. Use -uno to only see tracked files that have a recorded history within the repo (helpful when you have a crowded folder). |
git checkout <path/branch> | Update the current working file with the latest version of that file/branch from your local repo. |
git config | Used to configure your Git settings (those files in .git are modified through this). If the value you use has spaces, i.e “Sammy Slug”, put quotes around it. |
A common use of git config is to set your identity.
- For school assignments, the first thing I do is to set my local identity on the repo to be my school email as to not expose my personal email and also have better tracking to the UCSC GitLab. You can set this globally in your VM to be secure.
git config --global user.email mine@personal.com
git config --global user.name sluggo_wuggo
git config --local user.email slug@ucsc.edu
git config --local user.name “Sammy Slug”
Extra
Here’s some that you would greatly benefit from exploring, and you may have to use when you fall into issues with Git.
| Command | Explanation |
|---|---|
git merge | Attempt to merge the code of two divergent branches (or commits) into one. Merge conflicts are a rite of passage. Learning how to deal with them is important. If you are diligent about pushing/pulling as required, you will hopefully not fall into a need to merge. |
git rebase | Rebase your branch to settle history. |
git stash | A half-way between saving and committing. Useful if you want to keep something, but have not committed to it (ha ha). |
Best practices
Setting up SSH keys
SSH keys work by having a public and private key to assert the identity of a client, no password required. The public key can be known by anyone, but the private key is the missing half that authorizes any transaction. This is much more secure than using the standard HTTPS login credentials that can easily be intercepted as SSH keys are unique and should be as private as can be. Repos can often be cloned through SSH and I recommend you do so.
NEVER post your private key ANYWHERE.
The quickest procedure for doing so is:
- Run
ssh-keygen- There are several customization options. You should be fine with the default settings by pressing ENTER for each option, you can read more about the options here.
- Print out the public key (do NOT touch the private key):
- Assuming default settings, the public key is in
id_rsa.pub, the private key is inid_rsa. - If you stored the keys elsewhere, same procedure still applies with that other location. Don’t store keys inside of a repo.
- Assuming default settings, the public key is in
cat ~/.ssh/id_rsa.pub
- Copy the output. Add this SSH key to your GitLab account within the preferences.
- Preferences -> SSH keys -> Add new key
- Navigate to wherever you would like your repo to be:
cd <something> - Now navigate to any GitLab repository, you can now use the SSH url to clone it. Click the blue “Clone” button, and then click the clipboard icon near the “Clone with SSH” option.
- Use the following command on the terminal:
$ git clone <ssh_url> [optional: folder name like cse13s]
For example, once I have set up my SSH key, to clone my repo in a folder called cse13s:
$ git clone git@git.ucsc.edu:cse13s/fall23/snde.git cse13s
Doesn’t matter that I have leaked to you my SSH url, your public key has not been added to my GitLab account! Try doing the above and it will fail.
.gitignore
A .gitignore file does just that, it tells the Git system what to ignore when detecting modified files to stage and prevents them from being committed to the repo. These can be specific names of folders or files, or more commonly wildcards to detect anything of a certain file extension, and each pattern is placed on separate lines (like the examples below). Repos rarely ever contain compiled files or executables, as they are simply meant to be storage for code.
The .gitignore file is to be at the top level of your repo (i.e, in the same visible folder as the .git folder) and should generally always exist no matter the project. Some repo hosting sites provide template .gitignore’s when you specify what the primary language of the project will be!
If git add is not detecting .gitignore, use git add -f .gitignore to force the staging.
For any programming class, it’s generally not appreciated to leave IDE artifacts (.vscode, .idea, .metadata, etc.) as your personal development settings have nothing to do with the code (and may even contain some secrets). For a C class, you should make sure to never commit object files (extension .o) or executables (these can be harder to track on UNIX where .exe is not needed to designate executable files, be aware of what is staged using git status!).
The following is an example .gitignore for a typical Python project, in which I had some VSCode shenanigans, a virtual environment in a folder called .venv, and the potential for compiled Python code to appear.
* means any sequence of matching characters. ! negates the ignoring.
# Contents of .gitignore
.vscode
.venv
*.pyc
*.exe # to be safe!
!.py  # just in case, make sure to account for all .py files!
Now imagine a pedantic C programmer who does not like any other language. In an effort to ban any files from other common languages, their .gitignore may look like:
# No Python!
*.py
*.pyc

# No Java!
*.java
*.class

# But never any object files :)
*.o
Mac users often find a settings folder/file called .DS_Store in their repos when they develop on Mac (developing on your VM will most likely not cause this problem), please be sure to filter it out in .gitignore.
-
git addoptions from Stack Overflow ↩